Setting up a home theater speaker system doesn’t require a mansion or a six-figure budget, but it does demand clarity. Choosing the right speakers, understanding where they belong, and dialing in the sound properly transforms a standard living room into a space where movies pull you in and music hits like you’re meant to hear it. This guide walks you through the essentials: what each speaker type does, how to read the spec sheet, how to place speakers for maximum impact, and how to calibrate everything so it sounds right in your room. Whether you’re adding a pair of bookshelf fronts or building a full 7.2 surround system, these steps will keep you from common pitfalls and get you listening to quality sound fast.
Table of Contents
ToggleKey Takeaways
- A home theater speaker system requires matched speaker types—center channel (60–70% of dialogue), front left/right for ambient sound, and surrounds for immersion—each serving a specific acoustic purpose.
- Speaker specifications like frequency response, impedance, and sensitivity matter less than proper placement and room acoustics; a modest speaker in the right location outperforms an expensive one positioned poorly.
- Home theater speaker setup should begin with matched front channels (center, left, right), with surrounds and subwoofer added later, keeping the total 5.1 system budget between $1,200 and $3,500 for quality mid-market brands.
- Optimal placement positions front speakers at ear level, surrounds 1–2 feet above ear height at 90–110 degrees to the side, and subwoofers tested in multiple room corners to find the most balanced bass response.
- Automatic calibration using your receiver’s microphone tool (Audyssey, Yceryon, MCACC) transforms individual speakers into a cohesive soundfield by adjusting levels, distances, and crossover frequency for your specific room.
Understanding Home Theater Speaker Types and Their Roles
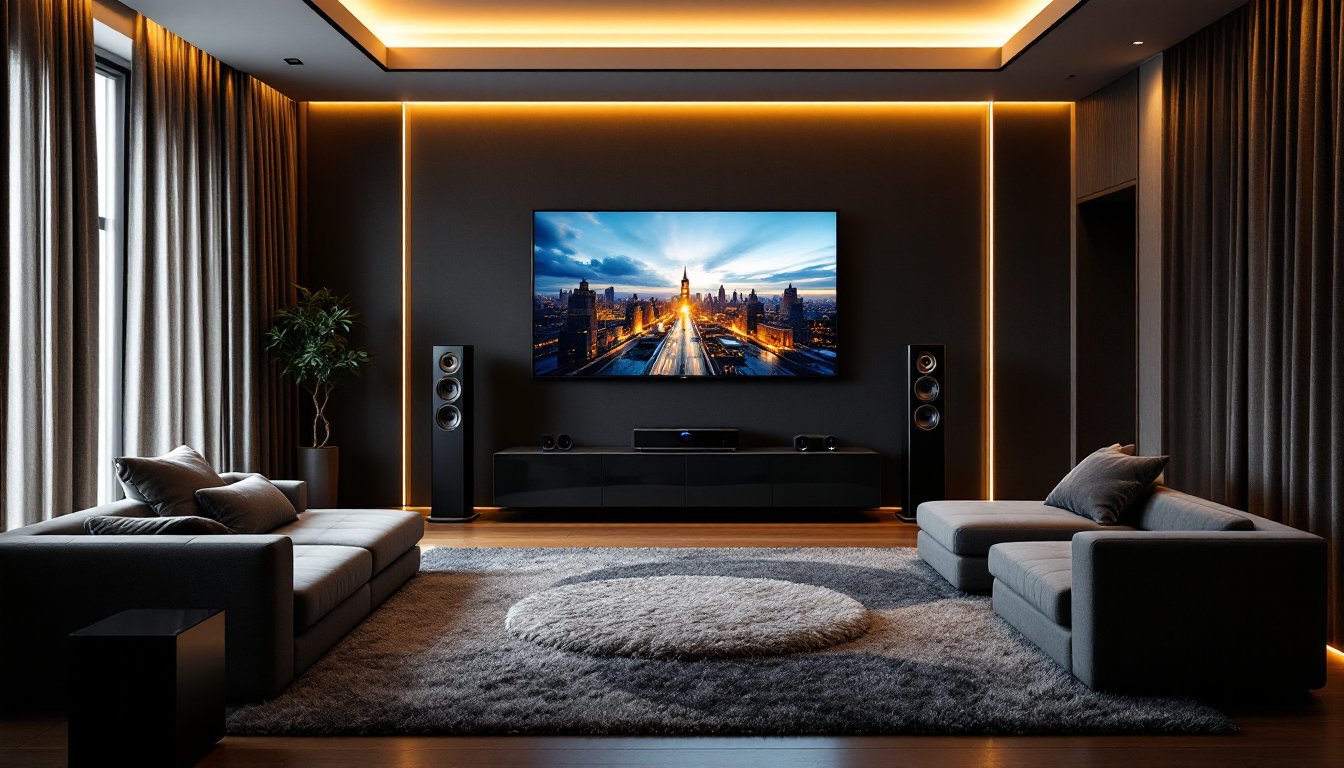
A home theater speaker system isn’t just one speaker doing all the work, each type serves a specific purpose. The center channel handles dialogue and keeps on-screen action anchored to the screen. The left and right front speakers carry music, ambient sound, and the wider sound field. Surround speakers (placed to the sides or rear) immerse you in ambient effects and off-screen action. A subwoofer reproduces low frequencies below 60 Hz that regular speakers can’t handle cleanly, explosions, thunder, and bass lines. Some systems add height speakers or Dolby Atmos channels for overhead effects, though these are optional for smaller rooms.
Center Channel, Front, and Surround Speakers Explained
The center channel is often the most important speaker in a home theater setup. It reproduces 60–70% of a movie’s soundtrack, so don’t skimp here. A larger, three-way center speaker (with a tweeter, midrange, and woofer) will handle dialogue clarity better than a tiny bookshelf model. Match your center channel to your front left and right speakers in tonal character, ideally, the same brand and speaker line, so sound pans smoothly across the screen without tonal shifts.
Front left and right speakers can be bookshelves, floorstanding towers, or matching pairs. Towers give you deeper bass and louder volume at lower cost per speaker, while bookshelves save space and often sound more focused in smaller rooms. The key is that they should blend seamlessly with the center channel. If you go from a big center to tiny bookshelves, the sound stage collapses when action moves off-screen.
Surround speakers aren’t meant to be loud, they’re meant to be spacious. A surround speaker should blend with the environment, not grab attention. Small bookshelf surrounds or in-wall speakers (if you’re building new construction) work well. The goal is to make you feel like sound is wrapping around you, not coming from a specific box on the wall. Placement matters far more than cost here: a modest surround in the right spot outperforms an expensive one in the wrong one.
Key Specifications and What They Mean for Your Setup
Speaker specs can feel like alphabet soup, but understanding a few core numbers prevents buyer’s remorse. Frequency response (measured in Hz) tells you the range a speaker covers, typically 50 Hz to 20 kHz for a full-range speaker. Lower numbers mean deeper bass: speakers rated to 40 Hz handle movie effects better than those rated to 80 Hz. Don’t obsess over a 5 Hz difference, though: it’s mostly marketing.
Impedance, measured in ohms, tells you how hard a speaker is to drive. Home theater speakers typically run 4–8 ohms. An 8-ohm speaker needs less amplifier power: a 4-ohm speaker demands more juice but can play louder. Match impedances if you’re running multiple speakers off one amp.
Sensitivity or SPL (sound pressure level), measured in decibels (dB), shows how loud a speaker gets with a standard 1-watt input from 1 meter away. Higher sensitivity (88 dB and up) means you need less amp power to reach loud volumes. Lower sensitivity (85 dB and below) requires a beefier amplifier. In a 12-by-16-foot room, an 85 dB speaker is fine: in a larger space or if you like action movies loud, aim for 87 dB or higher.
Impedance dips and crossover frequency matter too. The crossover point is where a speaker hands off low frequencies to a subwoofer, typically 80 Hz. Know this number, because it’ll come up when calibrating your receiver. Don’t stress over every decimal: a 2 dB variation won’t ruin your setup. Real-world room acoustics matter far more than a speaker’s perfect specs.
How to Choose the Right Speakers for Your Room Size and Budget
Match speaker size to your room. A 10-by-12-foot bedroom doesn’t need full-size towers: compact bookshelves or passive soundbars work fine. A 20-by-25-foot living room or media room benefits from larger drivers, 6- to 8-inch woofers in towers or big bookshelves push sound farther without strain. Small rooms produce bass buildup in corners: large rooms soak up sound and need higher-sensitivity speakers to fill the space.
Set your budget realistically. A decent three-piece front-channel setup (center + left + right) ranges from $400 to $1,500 depending on speaker size and brand. Add surrounds ($200–$600 per pair) and a subwoofer ($300–$1,200), and a complete 5.1 system lands somewhere between $1,200 and $3,500. You don’t need high-end names, solid mid-market brands from CNET reviews of home audio equipment often deliver better value than boutique models. Brands like Elac, Polk, Klipsch, and Dali punch above their price point.
Don’t blow half your budget on one speaker. A balanced system (where all speakers cost roughly the same) sounds better than a $2,000 center channel paired with $200 surrounds. If you’re starting small, buy the front three channels first, center, left, and right. Surrounds and a subwoofer can be added later. You’ll hear the difference immediately, and you’re not locked into an incomplete system that sounds unbalanced.
Installation Tips for Optimal Speaker Placement
Speaker placement is where DIYers often stumble. A great speaker in the wrong spot will sound worse than a mediocre speaker in the right spot. Here’s how to position yours.
Front speakers (center, left, right) should be at ear level or slightly above when you’re seated. The center channel sits above or below the TV: angle it toward seated ear height (typically 15 degrees down if it’s above, 15 degrees up if below). Left and right fronts go at roughly the same height. If your TV is 3 feet high and you’re sitting 8 feet away, mount fronts at 3–4 feet high. Avoid the temptation to hide them: speakers need a clear path to your ears.
Surrounds belong 1–2 feet above ear height, positioned 90–110 degrees to the side of the listening area (or slightly behind). Don’t put surround speakers behind the seating, they’ll only seem to come from one spot. A surround in the side wall behind you is better than one in a corner. If your room has only one wall for a surround, place it at the side, not behind.
Subwoofer placement is trrickiest. Start in a corner (corners reinforce bass) and sit where you’d normally watch. Have a helper move the sub around the room while it plays a movie, you’ll hear where it sounds most balanced. Bass modes vary wildly by room: a sub might sound boomy in one corner and lean in another. Common spots are front corners or along the front wall. Measure distances from the sub to your main seating: a quality AV receiver can use microphone calibration to time-align the sub to other speakers and flatten bass response automatically.
Run speaker wires in-wall only if you’re comfortable with basic wiring or hire a technician. Wall-running is neater but irreversible. Surface-mounted wire (in a raceway or behind trim) is safer for DIYers and equally invisible if done neatly. Specify 12 AWG or 14 AWG in-wall rated (CL2 or CL3) wire. Don’t use cheap lamp cord, it’s fire hazard and unshielded.
Tuning and Calibrating Your System for Best Performance
Unboxing and wiring speakers is only the start. Calibration is what transforms a random collection of drivers into a cohesive sound field. Modern receivers include automatic calibration features (Audyssey, Yceryon, MCACC) that use a microphone to measure speaker levels, distances, and frequency response in your specific room. If your receiver has this feature, use it. Plug the included microphone into the receiver, place it where you normally sit, and let it run. It’ll measure each speaker’s output and adjust levels and distances automatically.
If your receiver lacks auto-calibration, do it manually. Use a sound pressure level (SPL) meter (smartphone apps exist, but a real meter is $20–$50). Set each speaker to 75 dB at your main listening position with test tones. Adjust the receiver’s speaker levels to match. Then check the crossover frequency, most receivers default to 80 Hz, which is fine unless your front speakers are particularly small (then 100 Hz works). The crossover tells the receiver where to hand off low frequencies from mains to the sub.
Run a video calibration if your TV supports it. Use a tool like Spears & Muirhead or professional calibration software to set picture modes, but that’s outside speaker scope, focus on sound here. Play a calibration disc (like DTS, Dolby, or THX test tones) and listen critically. Does dialogue sound clear? Do surrounds enhance without overpowering? Does bass feel tight or boomy? Small tweaks (moving the sub a foot, raising surround level by 1–2 dB) often yield big improvements. Don’t ignore room acoustics: heavy curtains absorb sound, hard floors reflect it. If a room sounds boomy, add soft furnishings or bass traps in corners. If it sounds thin, pull back some absorption. The best speaker setup accounts for the room, not just the speakers.
Conclusion
Building a home theater speaker system doesn’t demand expertise, just clear thinking and patience with placement. Start with matched front channels, add surrounds and a subwoofer when budget allows, and invest time in setup and calibration. The difference between a haphazard system and a properly placed, tuned one is night and day. Your future movie nights will thank you for getting it right the first time.