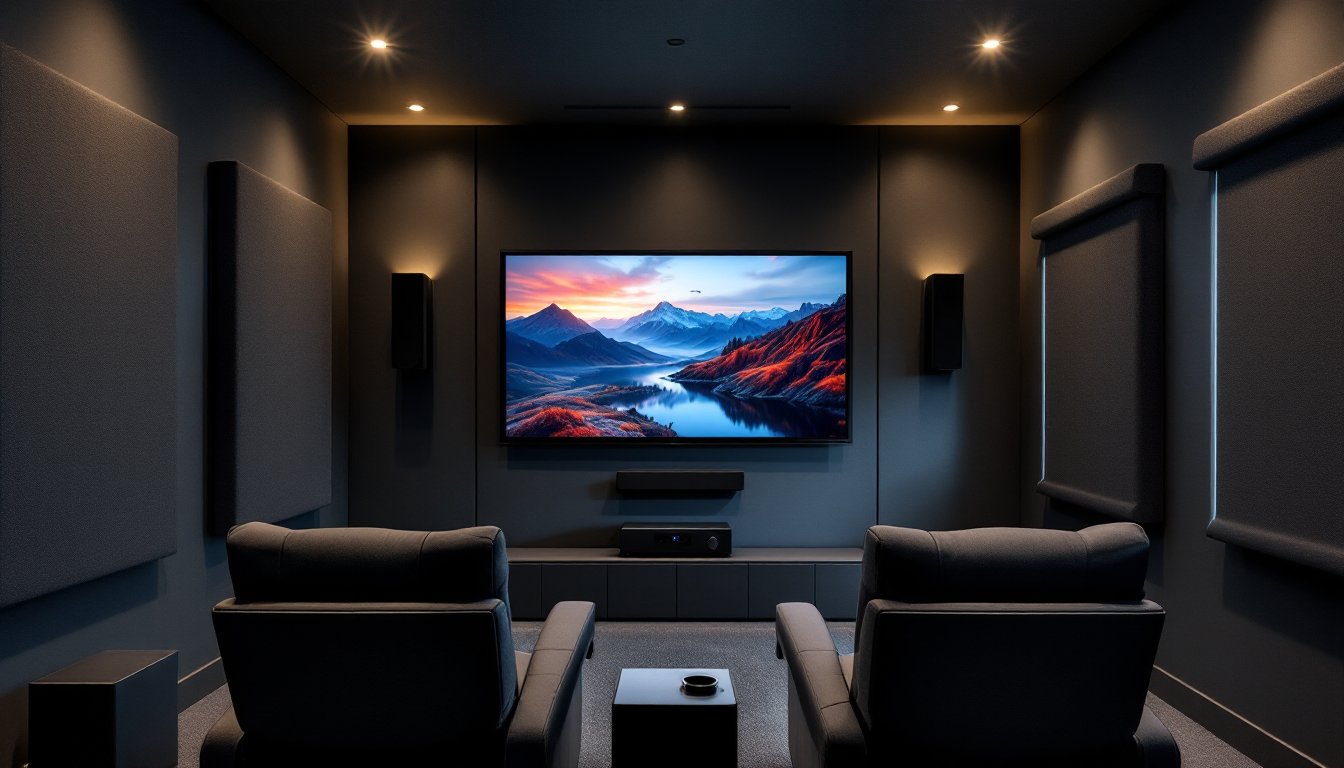
Setting up a home theater transforms a spare bedroom, basement, or living room into a personal cinema, a place where you control the experience without leaving the house. Whether you’re watching the latest blockbuster or settling in for a movie night with family, the right setup makes all the difference. Home theater installations don’t have to be intimidating: with careful planning and practical knowledge, most DIYers can tackle the project themselves or work confidently alongside a professional. This guide walks you through the essential steps: choosing equipment, preparing your space, managing cables, handling acoustics, selecting seating, and executing the install. You’ll learn what requires a permit (rarely) and when to call a pro (when audio calibration or structural work is involved).
Table of Contents
ToggleKey Takeaways
- Home theater installations require a solid foundation of proper display and audio equipment—invest in a surround receiver with discrete speakers rather than relying on a soundbar alone to achieve true cinematic sound.
- Plan your room layout carefully by measuring space, identifying screen/speaker placement, and checking electrical capacity; most standard home theater installations rarely require permits unless structural modifications are involved.
- Quality cable management using proper gauges, conduit, and labeling prevents signal degradation and simplifies troubleshooting, with HDMI runs kept under 25 feet and speaker cables under 50 feet for optimal performance.
- Acoustic treatment—covering 20–30% of wall surfaces with absorption materials and positioning bass traps in corners—improves sound clarity without over-deadening the room, while soundproofing requires structural changes like double drywall and sealed gaps.
- Mount your display securely into wall studs using proper lag bolts and position it at 55–65 inches center-height for TVs up to 65 inches, with speaker placement critically angled toward the listening area to deliver immersive sound quality.
- Proper calibration using a sound pressure level meter or professional technician ($300–500) ensures optimal audio and video performance, while dimmable LED lighting and blackout curtains enhance the overall viewing ambiance.
Essential Equipment for Your Home Theater Setup
Choosing the Right Display and Audio System
Your display and audio system are the foundation of any home theater. A projector and screen work best for dedicated media rooms or larger spaces: they create an immersive, theater-like experience but require light control and a smooth projection surface. TVs, whether LED, QLED, or mini-LED, are flexible for smaller rooms and double as a display surface for other activities. For a 2026 setup, aim for at least 4K resolution: 8K is available but content remains limited and pricing is premium.
Audio is where most DIYers underinvest. A soundbar alone won’t cut it for true home theater: you need a proper surround receiver (5.1 or 7.1 channels minimum) paired with discrete speakers: center, left/right mains, and surround speakers. The center channel handles dialogue, don’t skimp here. Subwoofers add low-frequency punch: most systems use one 10- to 12-inch unit, though larger rooms may benefit from two.
Consider whether you want a passive or active system. Passive speakers require a receiver with built-in amplification: active (powered) speakers don’t but take up more space and need multiple power outlets. Budget-conscious builders find that used quality speakers paired with a modern receiver often outperform budget all-in-one packages. Purchasing from retailers offering detailed product specs and return windows helps you test sound quality before committing.
Planning Your Layout and Room Preparation
Before buying anything, measure your space and sketch a rough floor plan. Identify where the screen or projector will mount, where you’ll position speakers, and how many seats fit comfortably. A typical theater-style seating arrangement places viewers about 1.5 times the screen width away: for a 55-inch TV, that’s roughly 7 to 9 feet back. Mark electrical outlets, HVAC vents, and existing obstacles (windows, doors, shelving).
Room acoustics depend partly on dimensions and materials. Small, square rooms tend to trap bass and create dead spots: slightly larger rectangular rooms perform better. Measure ceiling height and note wall materials, drywall, plaster, concrete, or wood paneling all affect sound bounce. If your room has hard surfaces and echo problems, you’ll need acoustic treatment.
Prepare the space physically. If the room isn’t climate-controlled, add a wall-mounted HVAC unit or portable air conditioner: home theater equipment generates heat, and viewer comfort matters. Check that existing electrical circuits can handle your gear load, projectors, receivers, lighting, and subwoofers draw significant power. A dedicated 20-amp circuit for audio/video is ideal and often requires an electrician. Verify local codes: some jurisdictions mandate permits for structural changes (like framing a new wall for a screen niche), though a standard equipment setup rarely needs one.
Wiring, Connectivity, and Cable Management
Cable runs are where organization saves headaches later. Run HDMI cables (high-speed, preferably 2.1 rated for 4K/8K) from your source devices to the receiver, and from the receiver to your display. Keep HDMI runs under 25 feet: longer runs may degrade signal. Optical or coaxial cables connect audio-only devices. Speaker cables (14-gauge or 12-gauge, depending on distance) run from the receiver to each speaker: keep runs under 50 feet to minimize signal loss.
Budget for quality surge protection, a uninterruptible power supply (UPS) or robust surge-protected power strip prevents damage if voltage spikes occur. Don’t plug multiple high-draw devices into one outlet: distribute them across circuits.
Cable management keeps the install looking professional. Route cables through walls using plastic conduit and fish tape (an electrician’s tool that costs $15–30). If in-wall runs are impossible, use adhesive-backed cable raceway along baseboards or behind furniture. Label every cable at both ends with tape and a marker: future troubleshooting will be much faster. For wireless connectivity, ensure your Wi-Fi reaches the media room: poor signal causes buffering. A mesh router or Wi-Fi extender in the room improves reliability.
Acoustics and Soundproofing Considerations
Soundproofing, preventing noise escape, is different from acoustic treatment, which manages reflections within the room. If you’re in an apartment or share walls with neighbors, soundproofing matters. Adding mass to walls (a second layer of drywall with green glue damping compound between) and sealing gaps (with acoustical caulk, not regular caulk) reduces sound transmission by 5–10 decibels. Insulating between studs adds another 3–5 dB. This is structural work: hire a contractor if you’re not comfortable with framing.
Acoustic treatment, absorbing sound inside the room, improves clarity and prevents echo. Hard surfaces like drywall and concrete reflect sound: soft materials like foam panels, fiberglass, and fabric-wrapped absorbers soak it up. A rule of thumb: cover 20–30% of wall surface area with absorption. Corners are high-frequency traps: place absorbent panels there. Bass traps (thicker, deeper panels) in corners handle low frequencies. DIYers can build frames from 2×4 lumber, fill them with mineral wool or fiberglass insulation, wrap them in acoustically transparent fabric, and mount them with adhesive or brackets. Pre-made panels run $50–200 each: DIY versions cost half as much.
Don’t over-deaden the room, you want controlled sound, not a dead, boxy feel. Test by clapping: a short, controlled decay is good. If sound dies instantly, ease back on treatment.
Seating, Comfort, and Ambiance
Seating is a major part of the experience. Theater-style recliners offer comfort and built-in cup holders but consume floor space: sectional sofas provide casual comfort for multiple people. Whichever you choose, confirm dimensions fit your floor plan before buying. A power recline sofa costs $1,500–3,500 but adds convenience: manual options run $600–1,500. If wiring a power seat, run electrical cable to it during the framing/prep stage to avoid extension cords.
Position seating so everyone has a clear view of the screen and center speaker. Avoid sightlines blocked by pillars or blocked by glare from windows or doors. Risers (elevated platforms) can help back-row viewers see over front-row heads in tight spaces: a simple 8-inch riser built from plywood and 2×6 joists works well.
Ambiance matters too. Install dimmable LED lighting, recessed cans or wall sconces are cleaner than lamps. A smart dimmer lets you set preset brightness levels for different activities. Add a wall-mounted remote control or integrate lights into your home automation system for one-touch control. Blackout curtains or roller shades block daylight: motorized versions are convenient and look polished. Paint walls a dark color (charcoal, dark gray, navy) to reduce reflection and improve picture quality on screens.
Installation Tips for DIY Enthusiasts
Mount your display safely. A full-motion TV mount costs $50–150 and allows angle adjustment: a fixed mount costs $20–50 but is simpler. For TVs up to 65 inches, mount at 55–65 inches center-height (from the floor to the screen center). For larger displays, mount slightly lower, about 50 inches center-height. Use a stud finder to locate wall studs (typically 16 inches on-center) and secure the mount with lag bolts into studs. Drywall anchors alone won’t support heavy TVs safely.
Projector mounts go on the ceiling: measure the throw distance (distance from projector lens to screen) before buying. Most home projectors need 1.5 to 2.5 screen widths of throw distance. Use a ceiling joist finder to locate solid framing, and install a heavy-duty adjustable ceiling mount. Run the power cord and video cable through the ceiling cavity if possible.
Speaker placement is critical for sound quality. Mount front left and right speakers at ear level or slightly above, angled toward the listening area. The center speaker goes directly above or below the display at ear level. Surround speakers mount on side walls at 90–110 degrees from center, about 1–2 feet above ear level. The subwoofer can go in a corner (bass is non-directional and tends to bunch in corners anyway) or near the front row.
When connecting, use the receiver’s speaker binding posts (not cheap clips, proper connectors prevent loose connections). Twist the stranded speaker wire ends together, then insert into the post. Label everything. Set receiver input levels using a sound pressure level meter (available as a smartphone app for $5–15 or a handheld unit for $30–100). Hiring a professional calibration technician ($300–500) ensures optimal performance: they adjust delay, level, and equalization using specialized equipment. If you’re handy with menus and spreadsheets, guides on home theater installation walk you through basic calibration steps yourself.
Test everything before finishing walls or hiding cables. Run multiple sources, streaming, Blu-ray, gaming console, and confirm all connections work. Check speaker phase (all cones should move forward at the same time) to avoid cancellation. Once satisfied, secure cables with clips, hide runs in conduit, and finish trim.