Tackling a whole-home remodel can feel like staring down a mountain of decisions. Paint colors clash, materials don’t match across rooms, and suddenly your kitchen upgrade looks nothing like your new flooring. Unified home remodeling flips that script, it’s the practice of coordinating design, materials, and construction across your entire home so every room feels intentional and connected. Rather than treating each space as an isolated project, you’re thinking about flow, consistency, and how renovations in one area support the next. For homeowners and DIY enthusiasts ready to move beyond piecemeal fixes, this approach delivers cohesion, better budget control, and a finished home that actually feels like one unified space instead of disconnected rooms.
Table of Contents
ToggleKey Takeaways
- Unified home remodeling coordinates design, materials, and construction across your entire home to create intentional, connected spaces that feel larger and more sophisticated than isolated room-by-room renovations.
- Consistency in unified home remodeling is achieved through shared design elements like flooring, color palettes, hardware finishes, and lighting fixtures—not identical rooms, but visually cohesive ones that flow naturally from space to space.
- Successful unified remodeling requires upfront planning with a design board, material specifications, and zone mapping, plus a realistic budget that includes 15–20% contingency for unexpected issues and accounts for material lead times.
- Prioritize infrastructure work (electrical, plumbing, HVAC, structural updates) before cosmetic finishes, and allow materials like hardwood flooring and tile 48–72 hours to acclimate to your home’s climate to prevent installation problems.
- Clear communication with contractors about your unified vision, combined with mock-ups, on-site inspections, and exact color codes and material specs, prevents costly misinterpretations and ensures cohesive execution across all spaces.
What Is Unified Home Remodeling?
Unified home remodeling is the process of coordinating renovations across your entire home, or large portions of it, using a deliberate design framework that carries through multiple spaces. Rather than updating your kitchen in isolation and then, five years later, overhauling your bathrooms with entirely different materials and finishes, unified remodeling binds those projects together from the start. Think of it as a master plan: you establish core design elements, color palettes, flooring materials, cabinet styles, hardware finishes, lighting approaches, and apply them consistently throughout.
This doesn’t mean everything looks identical. It means your hallway flooring complements your kitchen, your bathroom tile choices relate to your bedroom fixtures, and your paint selections feel intentional rather than random. A homeowner might choose to unify materials (e.g., white oak flooring in the living area, bedrooms, and kitchen), keep a consistent hardware finish (matte black handles on all cabinetry), or use a cohesive color language across rooms so transitions feel natural rather than jarring. ImproveNet offers resources and remodeling ideas that help homeowners understand scope and scale when planning whole-home projects. The benefit is immediate: your home feels larger, more sophisticated, and more functional because every decision was made with adjacent spaces in mind.
Key Principles of Cohesive Design Across Spaces
Maintaining Consistent Aesthetics and Flow
Consistency in unified remodeling doesn’t require boring sameness, it requires intentionality. When you walk from your kitchen into your living room, the transition should feel natural, not like entering a different house. This starts with flooring: if you’re installing 3/4-inch solid red oak with a satin finish in the kitchen, that same specification, or a close companion wood, in the adjoining living space creates visual continuity. Transitions matter too. If you’re moving between different floor types (wood to tile, for example), a transitional strip in matching metal or a carefully planned threshold prevents that jarring psychological bump.
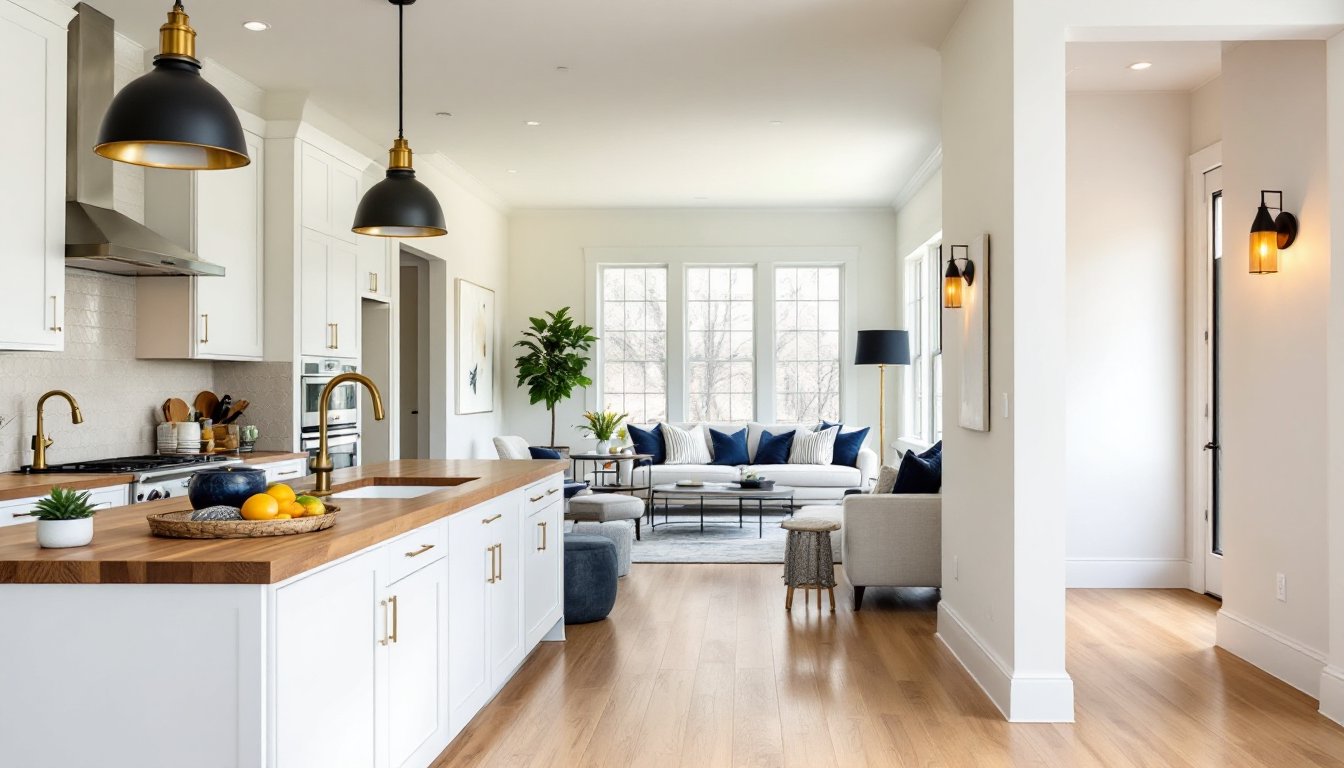
Color palettes tie spaces together powerfully. That doesn’t mean painting every wall beige. Instead, choose a primary color (say, a warm white or soft gray) that appears in multiple rooms, and let accent colors relate to that base. If your kitchen has white cabinetry with navy accents, those same navy tones appearing in a hallway runner or bedroom trim create instant visual conversation. Lighting is another often-overlooked unifier. Install similar fixture styles, say, matte black pendant lights or brushed brass sconces, across multiple rooms, and the entire home gains a designed, curated feel rather than a “we bought whatever was on sale” appearance.
Balancing Functionality with Visual Harmony
Beauty and purpose must walk hand in hand. A unified kitchen-to-dining-room renovation might use the same countertop material (perhaps butcher block or engineered quartz) in both spaces to echo the functional language, but place it differently: full counters in the kitchen, a narrow service counter in the dining area. This balances visual repetition with practical distinction, the rooms serve different purposes but speak the same design language.
Storage and layout consistency matters too. If your kitchen features frameless, soft-close cabinetry with European-style hinges, applying that same hardware finish and closure mechanism to bedroom built-ins or bathroom vanities reinforces that unified identity without requiring identical cabinet styles. Materials should also earn their place: if you’re using high-end tile in a shower, that same tile material (or a complementary piece from the same collection) appearing as a kitchen backsplash or entryway accent ties the investment together and justifies its cost through visual payoff. Think of your home like a well-tailored suit, different fabrics and textures, but designed to look intentional together.
Planning Your Unified Remodeling Project
Before you swing a hammer or place a tile, you need a roadmap. Unified remodeling demands more upfront planning than typical room-by-room work, but it saves time, money, and frustration down the line. Start by mapping your home’s zones: public spaces (kitchen, living, entryway), private spaces (bedrooms), and utility spaces (bathrooms, laundry). Then identify which zones you’ll renovate first and which will follow.
Priority sequencing matters. If you’re doing a kitchen and connected living area, knock that out together so flooring, paint, and finishes coordinate naturally. If bathrooms will come later, photograph your finalized kitchen carefully and note exact paint codes, hardware finishes, and material specifications. This becomes your reference library for future projects. Create a design board, physical or digital, that pins down your core elements: flooring samples, paint chips, cabinet door styles, hardware finishes, and lighting fixtures. Share this board with any contractors or craftspeople so everyone’s working from the same visual standard.
Establishing a Realistic Budget and Timeline
Whole-home unified remodeling is an investment, and honest budgeting separates dreamers from doers. HomeAdvisor provides cost estimators and project planning tools to help establish realistic expectations for different regions and material grades. Start by identifying what you can do yourself (painting, simple demolition, fixture installation) and what demands licensed professionals (electrical, plumbing, HVAC, structural work). A kitchen remodel averages $75,000–$150,000+ depending on finish level: bathrooms run $10,000–$35,000+ each. When you’re unifying multiple spaces, costs scale, but you often save on overlap: one contractor doing kitchen tile and a bathroom backsplash may offer better pricing than two separate jobs.
Timeline is equally critical. A single kitchen takes 8–12 weeks: add a connected living space and you’re pushing 12–16 weeks. If you’re planning a true whole-home project, you’re looking at a year or more, depending on scope. Budget an extra 15–20% for unforeseen issues: hidden rot, outdated wiring, structural surprises. Phase your project intelligently. Many homeowners tackle high-impact areas first (kitchen, primary bathroom) so they see results and maintain motivation. Less-visible spaces (secondary bathrooms, bedrooms) can follow. This also lets you adjust your design language slightly as you learn what works: early decisions inform later choices naturally.
Don’t skip contingency planning. If you’re living in the home during renovation, dust barriers, temporary bathroom and kitchen access, and protected pathways aren’t luxuries, they’re essentials. Budget time for material lead times too. Custom cabinetry, special tile, and hardware finishes often run 6–8 weeks, so order them before construction begins. This Old House’s comprehensive house renovation project documents how phasing and coordination transform a multi-room renovation, offering real-world pacing lessons for ambitious homeowners.
Implementation Strategy for Whole-Home Renovation
Execution makes or breaks a unified vision. Preparation is where most DIYers fail, you skip surface prep, misread measurements, or don’t acclimate materials to your home’s humidity and temperature, and suddenly your wood flooring cups or paint finish looks splotchy.
Start with infrastructure work: electrical, plumbing, HVAC, and any structural updates should happen before cosmetic finishes. If your unified vision includes new lighting throughout, have an electrician run all new circuits and rough-in all fixtures before walls close up. If flooring spans multiple rooms, prep all subfloors together (checking for level, addressing moisture concerns, installing underlayment) so transitions are flush and even. Let materials acclimate: hardwood flooring, engineered wood, and tile all need 48–72 hours in your home’s climate before installation so expansion and contraction don’t cause problems later.
Establish clear communication with your contractor or subcontractors about your unified vision. Provide that design board, exact color codes (paint, stain, hardware finishes), and material specs. Walk through the space together and discuss transitions: how flooring moves from room to room, where paint colors shift, and how lighting will coordinate. Request mock-ups or site visits in progress so you catch misinterpretations early, repainting a room is easier than replacing installed cabinetry.
For DIY work, take measurements obsessively and verify twice. Use a moisture meter if you’re installing hardwood. Apply primer before paint and sand between coats. For tile, use a level and spacers to maintain consistent grout line width. For cabinetry or built-ins, confirm wall plumb and use shims liberally: a cabinet 1/16-inch out of plumb looks visually wrong, even if it’s functional. Safety is non-negotiable: wear eye protection when cutting, dust masks when sanding, hearing protection when running loud tools, and gloves when handling sharp edges or chemicals. A moment of PPE beats a hospital visit and a delayed project. Finally, document as you go, photos of finishes in progress, material samples, and color codes become invaluable when you’re justifying costs or troubleshooting issues months later.